

In our previous article, we built a QGroundControl (QGC) development environment and compiled the source code. Many readers have since asked:
- What if I don’t have a flight controller?
- Can I learn drone development without a drone?
- How do I debug the MAVLink protocol?
- How do I verify QGC interface changes?
The answer is: absolutely yes.
In fact, most drone developers spend more time on SITL (Software In The Loop) simulation than on real aircraft during the early stages of development.
With SITL, you run the complete flight controller program on your PC, enabling:
- Flight controller logic validation
- MAVLink communication debugging
- Mission planning and testing
- QGroundControl integration
- Autonomous flight algorithm verification
You can complete most development work without a flight controller, a drone, or even a remote control. Today we will set up the ArduPilot development environment from scratch and launch your first SITL simulated aircraft.
At Aomway, we build FPV video transmission systems that connect flight controllers to pilots’ goggles — understanding the ArduPilot and MAVLink ecosystem is essential for our engineering team.
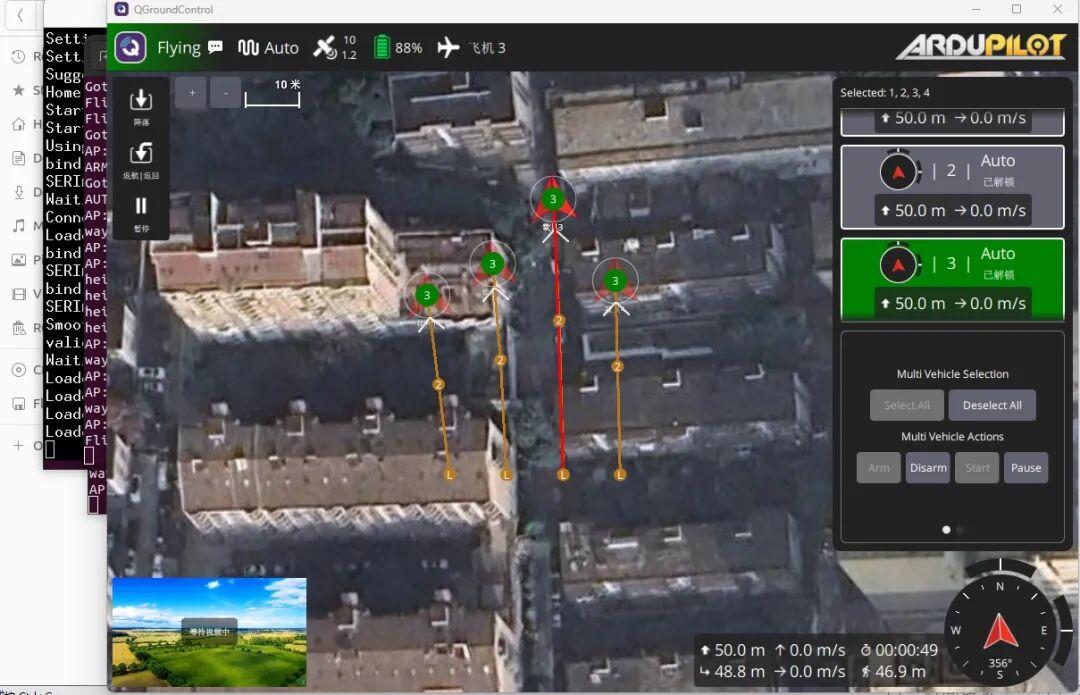
What is ArduPilot?
ArduPilot is one of the most popular open-source autopilot projects in the world. It supports:
- Multirotor (Copter)
- Fixed-wing (Plane)
- Ground vehicles (Rover)
- Boats
- Submersibles (Sub)
Its core features:
- Fully open source
- Active community
- MAVLink protocol support
- Support for mainstream hardware such as PX4, Cube, and Pixhawk
The system architecture:
Ground Station (QGC/Mission Planner)
           ↑
        MAVLink
           ↑
    Flight Controller
           ↑
       ArduPilot
SITL allows the flight controller program to run directly on your PC.
What is SITL?
SITL stands for Software In The Loop.
In simple terms:
Real flight controller → runs on Pixhawk
becomes:
Flight controller code → runs on PC
This lets us:
- Debug code
- Inspect MAVLink messages
- Test autonomous flight logic
- Validate ground station features
All without any hardware. For developers, this is the lowest-cost way to learn.
Development Environment
This tutorial uses:
- Windows 11
- WSL2 Ubuntu 22.04
- ArduPilot Copter 4.6.3
Recommended specs:
- CPU: 4+ cores
- RAM: 16GB+
- Disk: 50GB+
Install Base Dependencies
Update the system:
sudo apt update
sudo apt upgrade
Install development tools:
sudo apt install git
sudo apt install python3
sudo apt install python3-pip
sudo apt install python3-dev
sudo apt install wget
Install ArduPilot dependencies:
sudo apt install software-properties-commonDownload ArduPilot Source Code
Create a working directory:
mkdir ~/drone
cd ~/drone
Clone the source:
git clone https://github.com/ArduPilot/ardupilot.gitEnter the project:
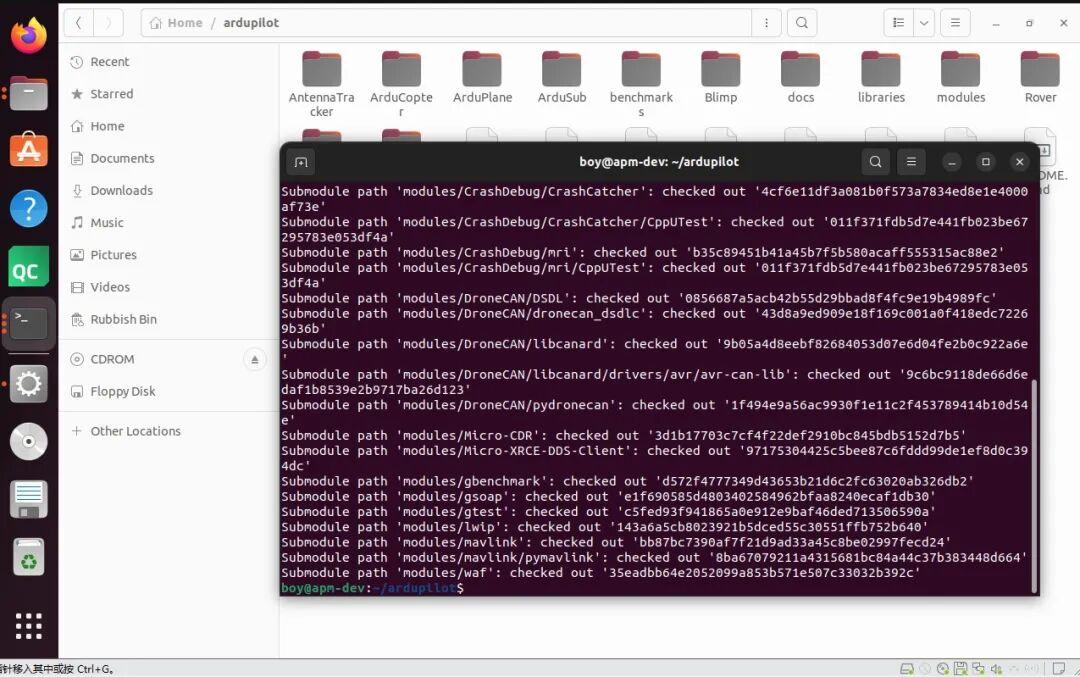
cd ardupilotUpdate submodules:
git submodule update --init --recursiveThis step takes a while — please be patient.
Install the ArduPilot Environment Script
The official one-click installer script is provided:
Tools/environment_install/install-prereqs-ubuntu.sh -yThe script automatically installs:
- gcc
- g++
- python
- waf
- sim_vehicle
- MAVProxy
- Build toolchain
After installation, run:
source ~/.profileto activate the environment variables.
Compile ArduCopter
Enter the project root:
cd ~/drone/ardupilotConfigure the build environment:
./waf configureCompile the multirotor flight controller:
./waf copterThe first build may take a few minutes. On success you will see:
Build successful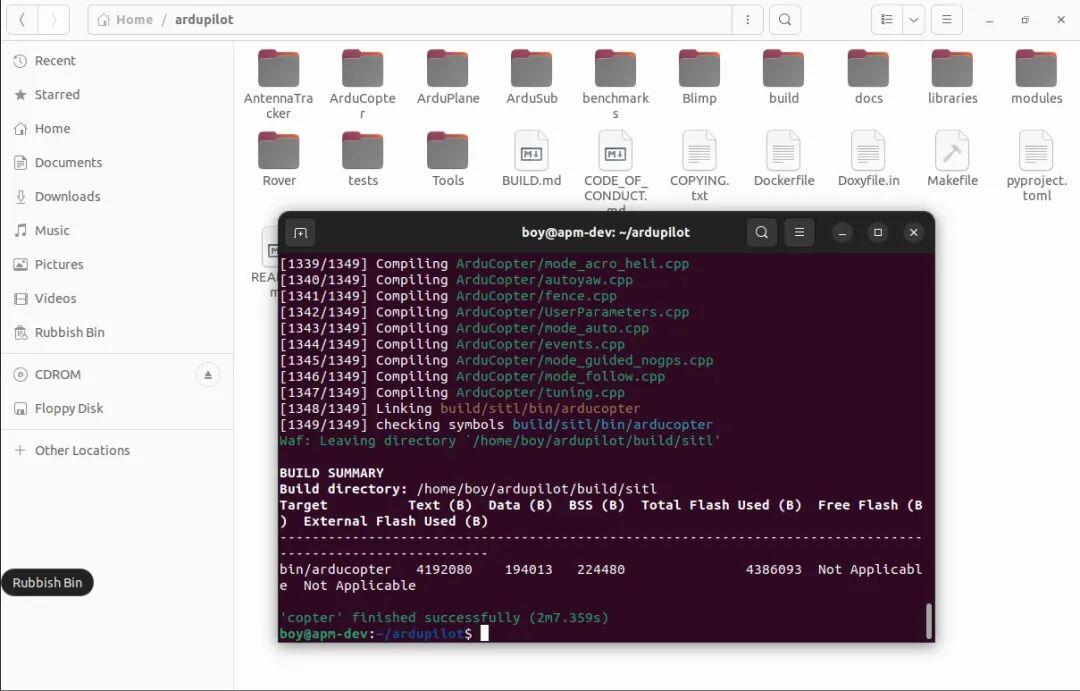
Launch Your First SITL
Run:
sim_vehicle.py -v ArduCopter -I 0 --sysid=1 --out 192.168.191.1:14550After a moment you will see:
Starting ArduCopterThen:
Ready to FLYYour flight controller has successfully started — a complete virtual autopilot is now running on your PC.
Connect QGroundControl
For QGC users, connection is simpler than with Mission Planner. SITL sends MAVLink data to:
UDP 14550QGC usually auto-discovers the aircraft on startup. If not:
Application Settings → Comm LinksAdd a new link:
UDP, 14550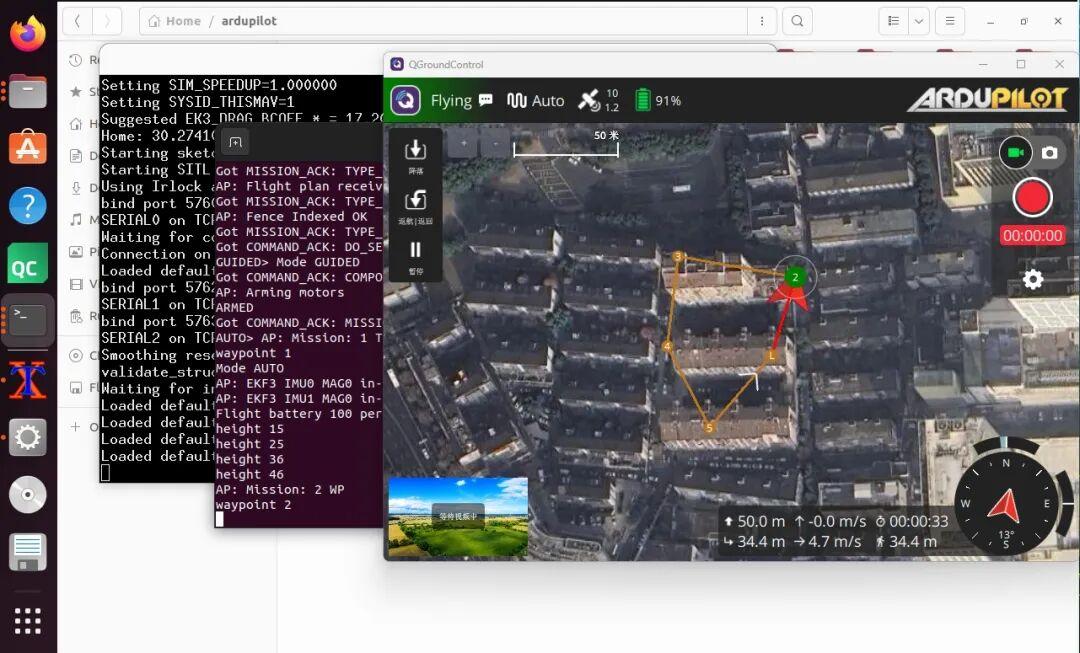
Test Automatic Takeoff
In the MAVProxy console, enter:
mode guidedThen arm the aircraft:
arm throttleExecute takeoff:
takeoff 10This commands a takeoff to 10 meters. In QGroundControl you will see:
- Aircraft armed
- Altitude rising
- Attitude changes
- MAVLink data refreshing
The entire process requires no real aircraft.
Testing Multi-Vehicle Simulation
The official multi-vehicle command:
sim_vehicle.py -v Copter --map --console --count 5 --auto-sysid --location CMAC --auto-offset-line 90,10 --mcast --out 192.168.111.1:14550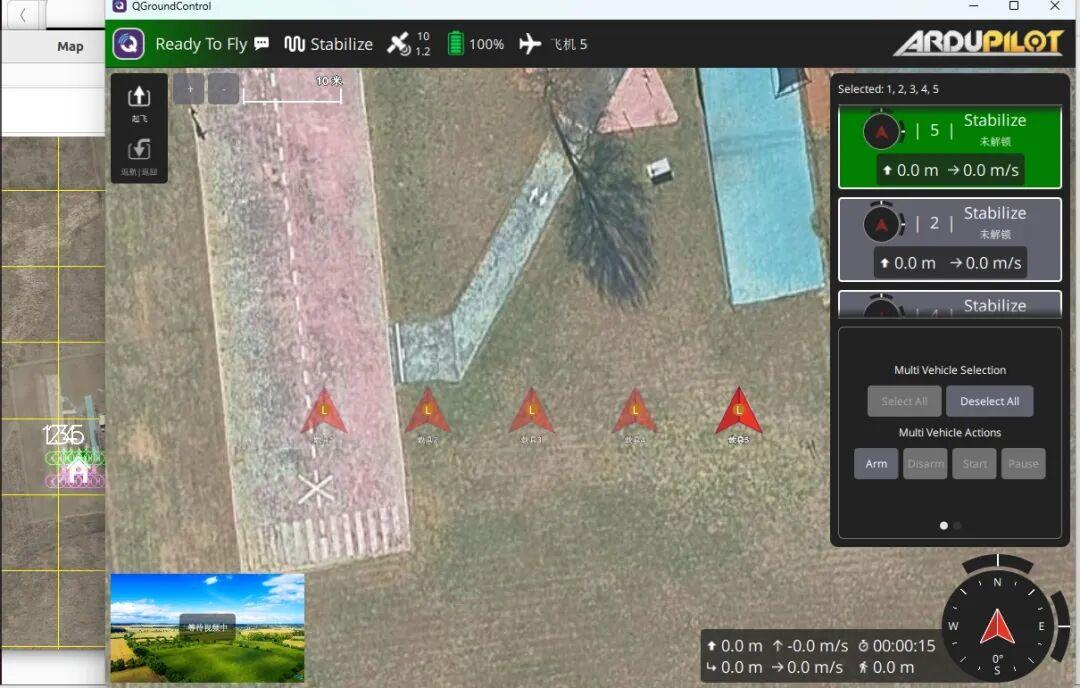
In practice this is hard to control. We recommend launching multiple single-vehicle terminals as described above — it runs much more smoothly.
What Can SITL Do?
Many beginners think SITL is just a demo tool. In reality, a huge amount of development work happens inside SITL. For example:
MAVLink Protocol Analysis
Inspect messages such as:
- HEARTBEAT
- ATTITUDE
- GLOBAL_POSITION_INT
- SYS_STATUS
QGroundControl Development
Debug interfaces like:
- Flight View
- Mission
- Map
- Parameter System
Autonomous Flight Algorithms
Validate features such as:
- Waypoint flight
- Auto return-to-launch
- Auto landing
- Obstacle avoidance logic
Common Issues
QGC Cannot Find the Aircraft
Check whether UDP port 14550 is blocked by your firewall.
SITL Fails to Start
Re-run:
git submodule update --init --recursiveand confirm all dependencies are complete.
Compilation Errors
Run:
./waf clean
./waf configure
./waf copter
and rebuild.
Summary
For drone developers, the first step to learning flight controller development is not buying an aircraft — it is mastering SITL.
With ArduPilot + SITL, you can complete on an ordinary PC:
- Flight controller development
- MAVLink debugging
- Ground station integration
- Autonomous flight validation
All with zero hardware cost. At Aomway, our engineers use the same workflow to validate FPV video links and telemetry integration before hardware is ready.
In the next article we will connect QGroundControl to ArduPilot SITL — from MAVLink communication to automatic takeoff.
If you have any questions about this topic, feel free to contact us at [email protected]
Have questions about this article? Feel free to contact us at [email protected] — we’re happy to help!

Pingback: pymavlink for ArduPilot: Raspberry Pi Companion Computer – AOMWAY