
Key Takeaways
- LiteWing is an open-source quadcopter built on the ESP32-S3, flashed with the ESP-FC build of Betaflight.
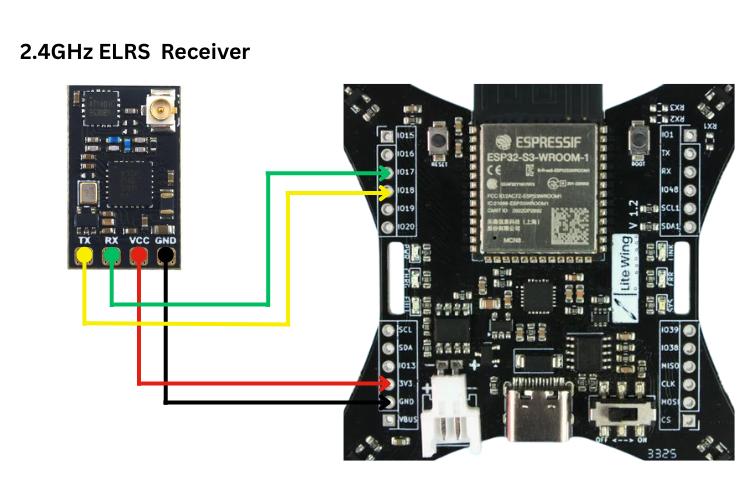
- Motor outputs map to GPIO 6, 5, 3, and 4, while the UART uses TX on GPIO 17 and RX on GPIO 18.
- The board’s IMU needs a 270-degree clockwise rotation in Board and Sensor Alignment before it will fly properly.
- It drives brushed DC motors, so the motor protocol is Brushed at an 8000 Hz PWM frequency.
- The optional LoRa path sends INT8 feature vectors from a TinyML camera instead of pixels, cutting bandwidth dramatically.
The ESP32-S3 LiteWing turns a small open-source quadcopter board into a fully tunable Betaflight drone you can log, retune, and modify. The build is really about matching one hardware platform to a mature flight-software ecosystem: flash the ESP-FC firmware, remap every GPIO, correct the IMU orientation, and wire up an ELRS receiver. This guide walks the whole sequence, then extends it to LoRa edge vision.
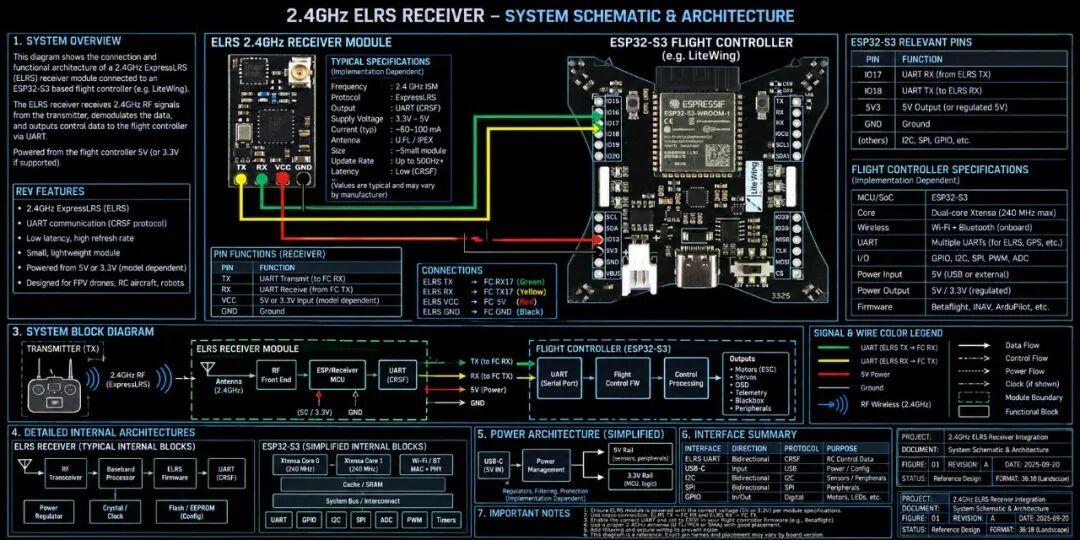
What You Are Actually Building
LiteWing is a small open-source quadcopter built around the ESP32-S3 microcontroller. The project takes one specific hardware platform and adapts it to a mature flight-control software ecosystem – flashing Betaflight onto a board it was never designed for, then telling the firmware exactly how the hardware is wired.
LiteWing is itself a quadcopter built on the ESP32-S3.
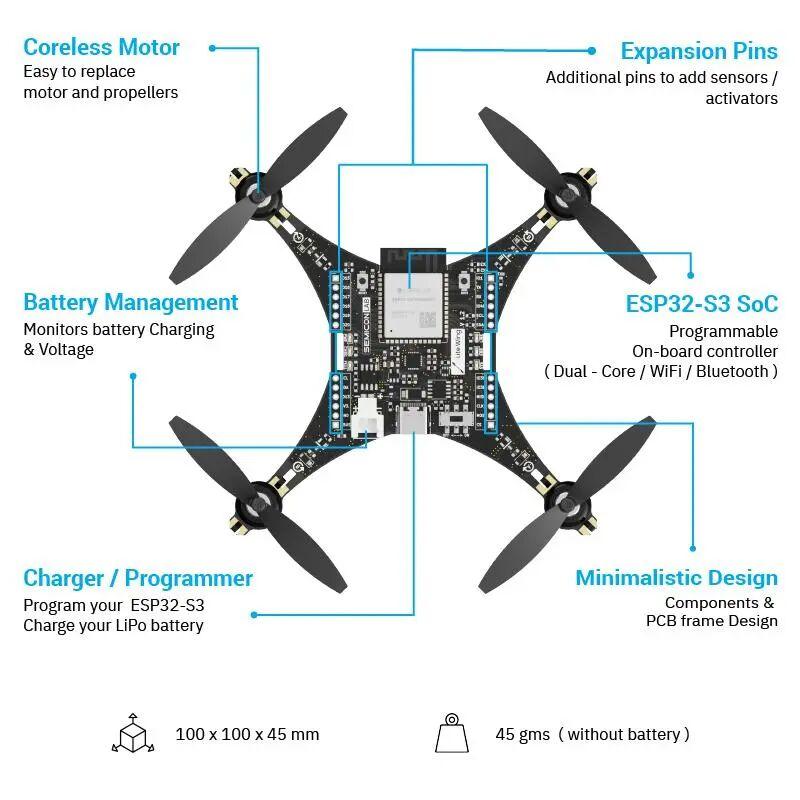
The real task: adapt one concrete hardware platform to a mature flight-control software ecosystem.
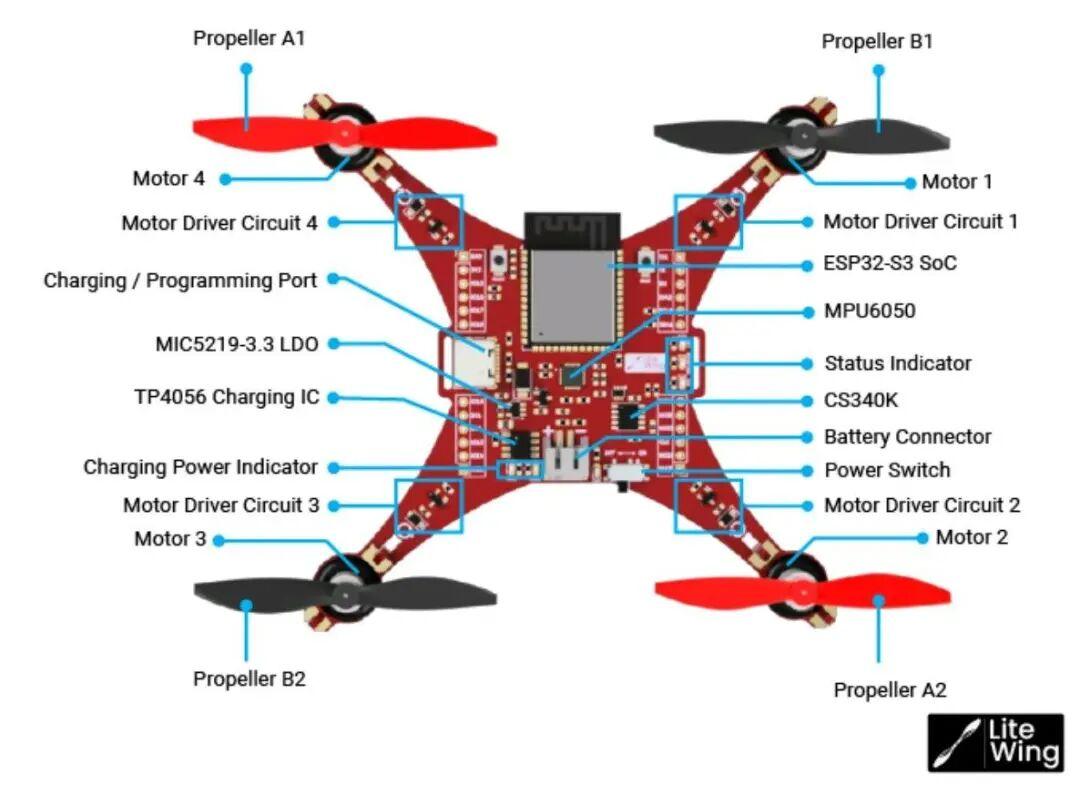
Preparing the hardware.
Parts and Software You Need
Hardware:
- LiteWing ESP32-S3 drone
- ELRS receiver
- ELRS transmitter
- USB data cable
- LiPo battery
Software:
- Betaflight Configurator
- ESP32-S3 Betaflight firmware
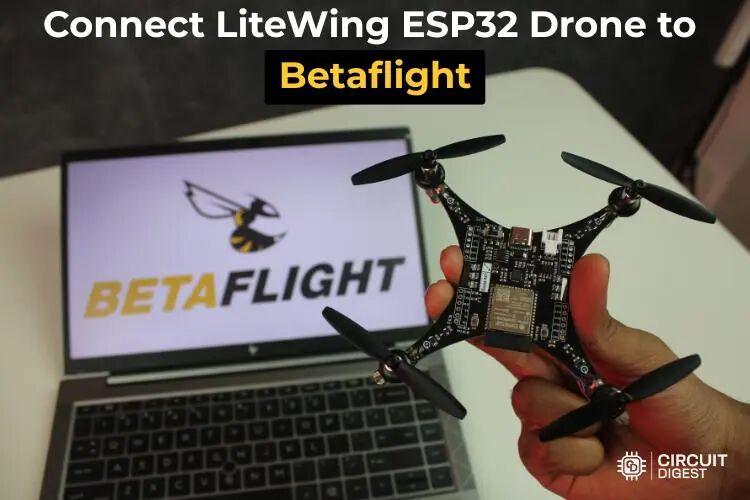
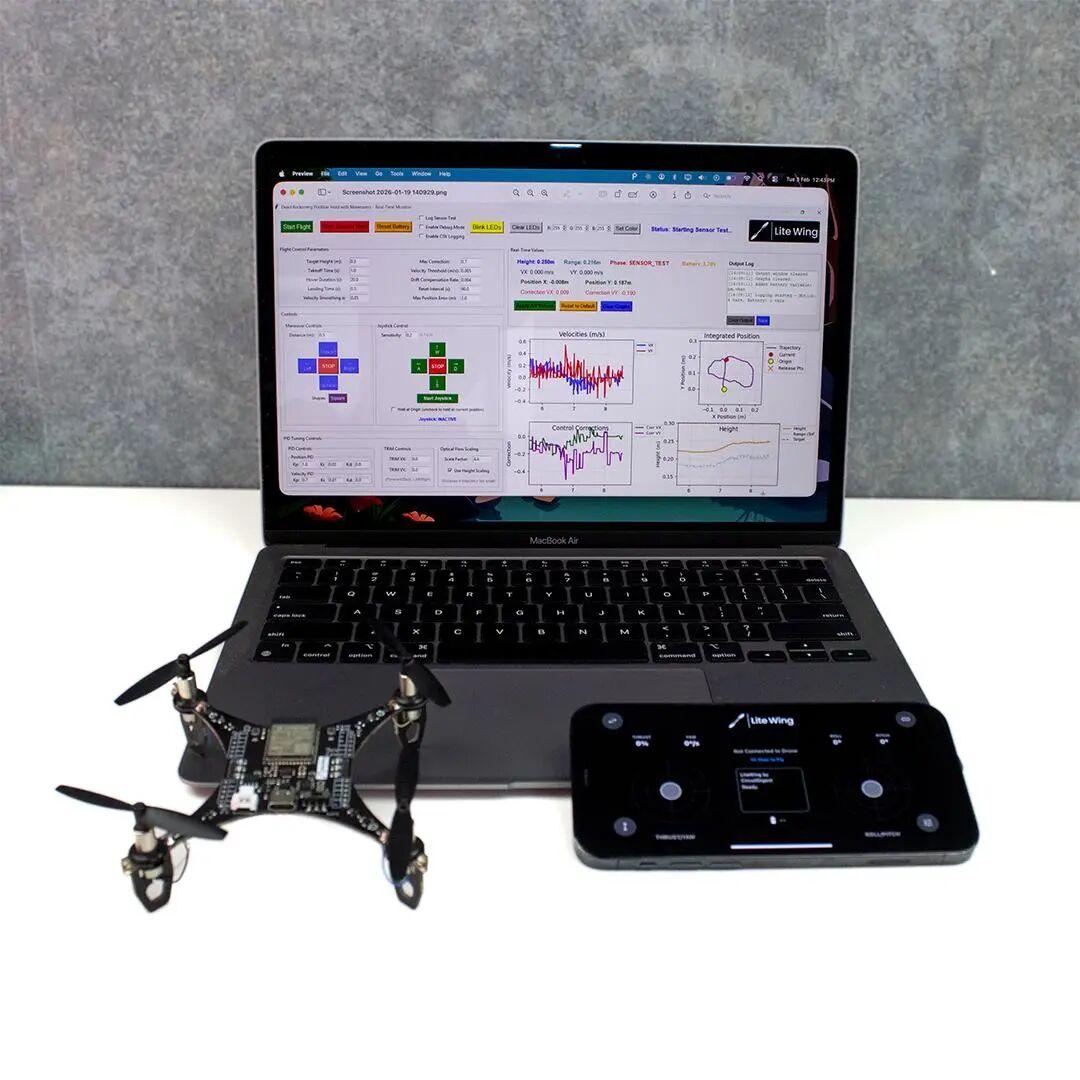
Software preparation.
Step 1 – Flash the Firmware
Use the ESP32-S3 Betaflight build provided by the ESP-FC repository and flash it through the Espressif web tool.
Releases: https://github.com/rtlopez/esp-fc/releases
Direct ESP32-S3 download: https://github.com/rtlopez/esp-fc/releases/download/v0.2.1/espfc_v0.2.1_esp32s3_0x00.bin.zip
Web flashing tool: https://espressif.github.io/esptool-js/
Flashing through the ESP Tool web interface.
Step 2 – Install Betaflight Configurator
The connection path is USB, then ESP32-S3, then the COM port, then Betaflight Configurator.
On the first connection you need to enable Options, Show All Serial Devices, then manually select LiteWing’s COM port.
Selecting the LiteWing COM port.
Step 3 – Remap the GPIOs
You must tell Betaflight how the hardware is actually wired. The pin assignments are:
| Function | Pin |
|---|---|
| Motor 1 | GPIO 6 |
| Motor 2 | GPIO 5 |
| Motor 3 | GPIO 3 |
| Motor 4 | GPIO 4 |
| UART TX | GPIO 17 |
| UART RX | GPIO 18 |
Then save and reboot.
The GPIO mapping screen.
Step 4 – Correct the IMU Orientation
Go to Configuration, then Board and Sensor Alignment, and set First Gyro to CW 270 degrees.
The flight controller has to know which way the sensor is mounted: the sensor’s X, Y, and Z axes must map to the aircraft’s forward/back, left/right, and up/down directions. Get this wrong and the quad will fight itself the moment it leaves the ground.
Correcting the IMU orientation.
Step 5 – Set Up Battery Voltage Sensing
In the Power and Battery tab:
- Voltage Source: Onboard ADC
- Scale: 10
- Divider: 1
- Multiplier: 2
Step 6 – Configure the Brushed Motors
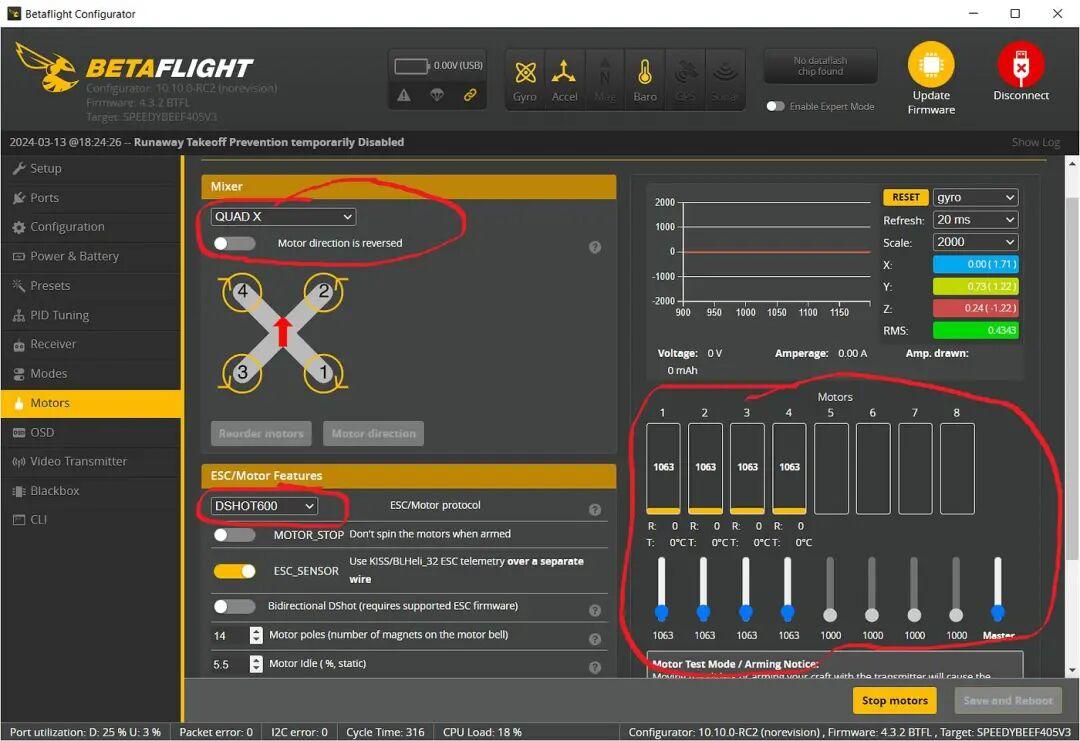
LiteWing uses brushed DC motors, not brushless ones. That changes the motor settings:
- Motor Protocol: Brushed
- PWM Frequency: 8000 Hz
Step 7 – Add an ELRS Receiver
Wiring is a crossover:
- ELRS TX to ESP32 RX
- ELRS RX to ESP32 TX
- 3.3 V
TX and RX cross over – one side’s transmitter goes to the other side’s receiver.
In Betaflight, open Ports, enable Serial RX on the matching UART, then under Receiver choose Serial-Based Receiver, CRSF. At that point, pushing the transmitter sticks should show live channel movement inside Betaflight.
Step 8 – Assign ARM, ANGLE, and BLACKBOX
Map transmitter switches to flight modes:
- ARM arms and disarms the motors
- ANGLE enables self-leveling
- BLACKBOX records flight data
Blackbox logging captures IMU data, PID data, motor outputs, RC input, and attitude changes – everything you need to diagnose behavior after a flight.
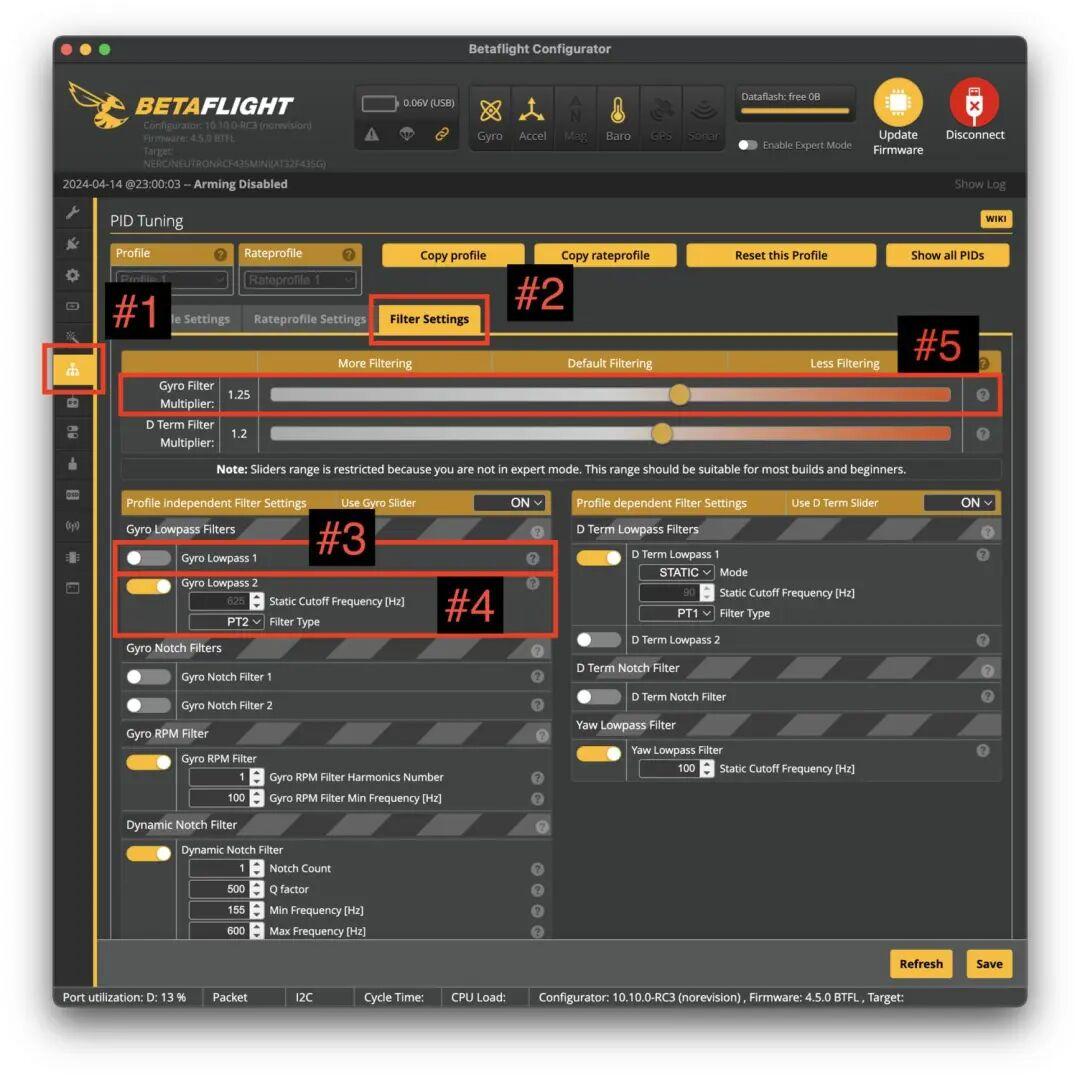
Step 9 – Tune the PID Loop
Use Blackbox logs to analyze oscillation and motor imbalance, then keep refining PID values.
The stabilization loop of a quadcopter runs like this:
- The IMU detects how the aircraft is moving
- Attitude error is computed
- PID calculates how much each of the four motors should increase or decrease power
- PWM signals drive the motors
- The aircraft’s attitude changes
- The IMU measures again, and the loop repeats
It is a high-speed closed loop: IMU to attitude estimate to PID to the four motors to the airframe and back to the IMU. Everything in that chain is what you are tuning when you tune PID.
Beyond the Build: LoRa Edge Vision
The guiding principle is simple: do not send pixels, send the meaning of pixels.
- The ESP32-S3 camera processes frames locally with a TinyML model.
- The whole image is compressed into a very small INT8 feature vector.
- Only that tiny feature vector is transmitted over LoRa.
- A base station receives it and uses a larger AI model to interpret or reconstruct the scene.
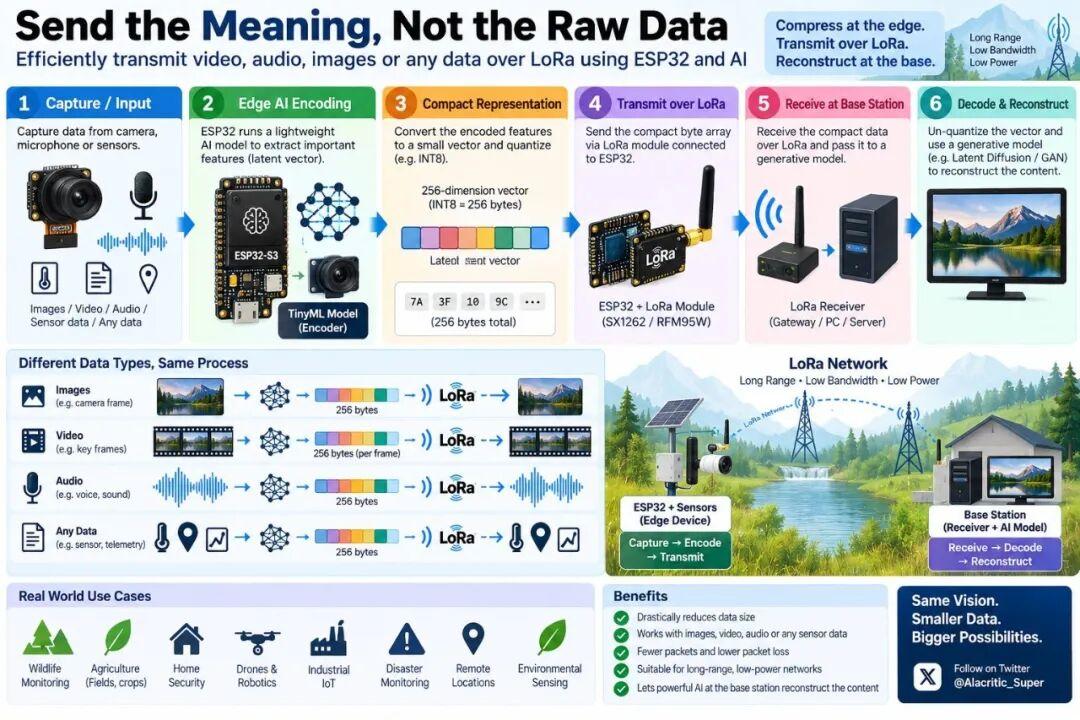
Sending feature vectors instead of pixels.
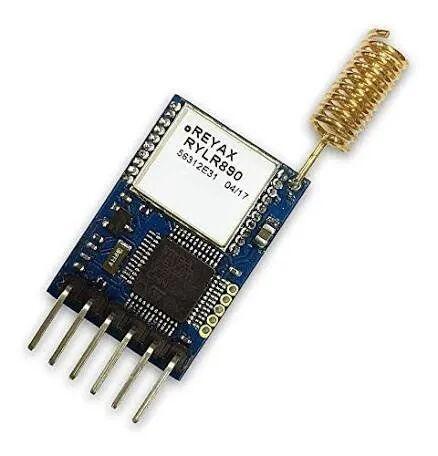
LoRa modules: SX1262 or SX1276 modules (Heltec WiFi LoRa 32 V3, RAK3112, Wio-SX1262) connect directly to the ESP32-S3, or you can use an integrated board.
Base station (receiver): another ESP32-S3 with LoRa, or a Raspberry Pi or PC with a LoRa module, responsible for receiving and running the larger model.
Edge node (sender): a Seeed XIAO ESP32-S3 Sense or LILYGO T-Camera S3 – both carry an OV2640 camera and PSRAM and support TinyML directly.
LoRa edge vision hardware options.
LoRa vs WiFi: What Actually Goes Over the Air
- WiFi approach: send the picture as-is – enough bandwidth, short range, high power draw.
- LoRa plus edge AI: the camera “understands” the scene first and transmits only the key information, at very low bandwidth, over very long range, at very low power.
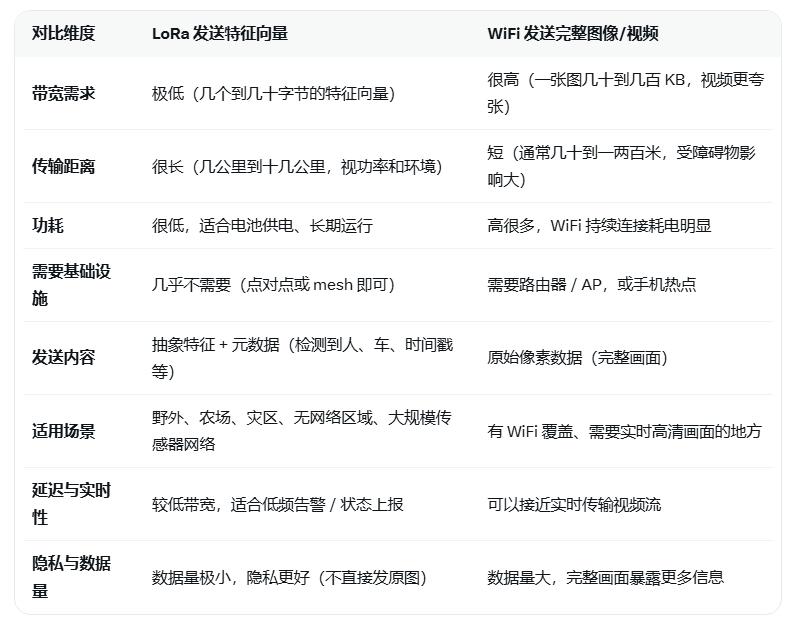
LoRa versus WiFi for camera data.
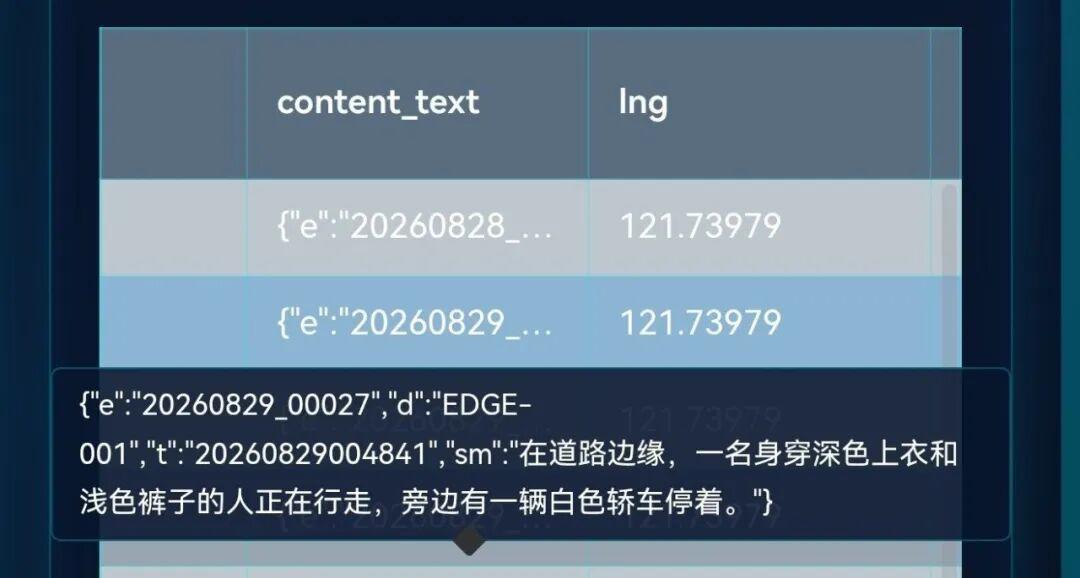
Put simply: a camera running lightweight vision processing at the edge detects people, vehicles, or objects locally, then sends the important results over a LoRa mesh.
Instead of pushing an entire video stream, devices can send AI-generated metadata, alerts, timestamps, and selected low-resolution frames between nodes. Bandwidth drops dramatically while the system stays practical in remote areas, on farms, in disaster zones, or across large sensor networks.
Edge vision reporting detections over a LoRa mesh.
What the Community Says
The original discussion drew several practical objections worth reading before you commit to the LoRa path:
- One developer argues that sending AI metadata amounts to transmitting “hey, I saw something” with no image at all. The best alternative they suggest is Zigbee, though its range is shorter than LoRa. In Zigbee you cannot send a whole image in one go – you must break it into chunks, and if any packet is lost the image is corrupted with nothing you can do about it.
- Another points out that the ESP32’s processor power draw is too high, recommending a Nordic nRF52840 paired with a Wio-SX1262 wireless module. Having built a similar system last year, they note you would not use ESP32 WiFi because it makes power consumption extremely high – whether solar or pure battery powered, Nordic is what you want. They suggest looking at RAK solutions.
- A third comment supports sending detection results rather than raw video for bandwidth-constrained links, adding that edge filtering also improves privacy because the device never transmits unnecessary footage.
- A fourth is blunt: the ESP32 is not fast enough to send images, but using it as a smart motion detector may well be worth it.
Have questions about this article? Feel free to contact us at [email protected] — we’re happy to help!
Frequently Asked Questions
What is LiteWing and what makes it different?
LiteWing is an open-source quadcopter built on the ESP32-S3 microcontroller. What makes it unusual is that it runs Betaflight, a flight-control ecosystem designed for conventional flight controllers. That means you get Betaflight’s tuning, logging, and configuration tools on an inexpensive ESP32-S3 board, at the cost of remapping every pin yourself.
Which firmware do I flash onto the ESP32-S3 flight controller?
Use the ESP32-S3 build from the ESP-FC repository, currently version 0.2.1. Download the esp32s3 binary from the releases page and flash it through the Espressif web tool at espressif.github.io/esptool-js. No desktop flashing utility is required, but you do need a USB data cable rather than a charge-only cable.
Why does the IMU need a 270-degree rotation?
Because the physical IMU is mounted rotated relative to the airframe’s axes. In Betaflight’s Board and Sensor Alignment you set First Gyro to CW 270 degrees so the firmware knows the sensor’s X, Y, and Z correspond to the aircraft’s forward/back, left/right, and up/down. Without it, the flight controller corrects in the wrong direction.
Can the ESP32-S3 send camera images over LoRa?
Not raw images – the ESP32 is too slow and LoRa’s bandwidth is far too narrow. The workable approach is to run a TinyML model on-device, compress each frame into a small INT8 feature vector, and transmit only that vector. A base station with a larger model then interprets the result. Several community members suggest Nordic nRF52840 hardware instead for lower power draw.
What motor protocol does the LiteWing use?
It uses brushed DC motors rather than brushless ones, so in Betaflight you set Motor Protocol to Brushed and PWM Frequency to 8000 Hz. This is a key difference from typical FPV builds: brushed motors are simpler and cheaper but far less efficient and shorter-lived than brushless equivalents.
About Aomway
Aomway is a technology company specializing in drone and FPV equipment, publishing in-depth analyses of motor control, embedded hardware, and open-source robotics projects. With over 15 years of industry experience, Aomway covers the full spectrum from flight controllers and FPV goggles to thermal imaging cameras and long-range datalinks for the global drone community.